In Azure Stack you can publish your own images essentially virtual machines that can be used when deploying a new virtual machine. This is handy for publishing servers that need to be pre-configured in a certain way for consumers of your cloud. In order for your published images to show up as an option in compute within Azure Stack the images need to be added to the Platform Image Repository (PIR) within the Compute Resource Provider (CRP).
SUSE has recently published a pre-built SUSE Linux Enterprise Server 12 SP1 image that has been prepped specifically for Azure Stack. This image is ready to go and can be published to the CRP’s PIR without any needed prep of the virtual machine. In this blog post I am going to walk through the steps I took to add this image to my Azure Stack.
SUSE already has an image out there for Azure. The SUSE image used on Azure does not work right now on Azure Stack. As of right now Azure and Azure Stack have different “initialization code”. In the future I would expect these to be the same. The SUSE image also includes SUSE/azurectl a command line tool that helps you manage SUSE updates from a Linux VM hosted on Azure. More info on this here: https://github.com/SUSE/azurectl. To download the SUSE Azure Stack image go to https://download.suse.com and complete the fields as show in the following screenshot.
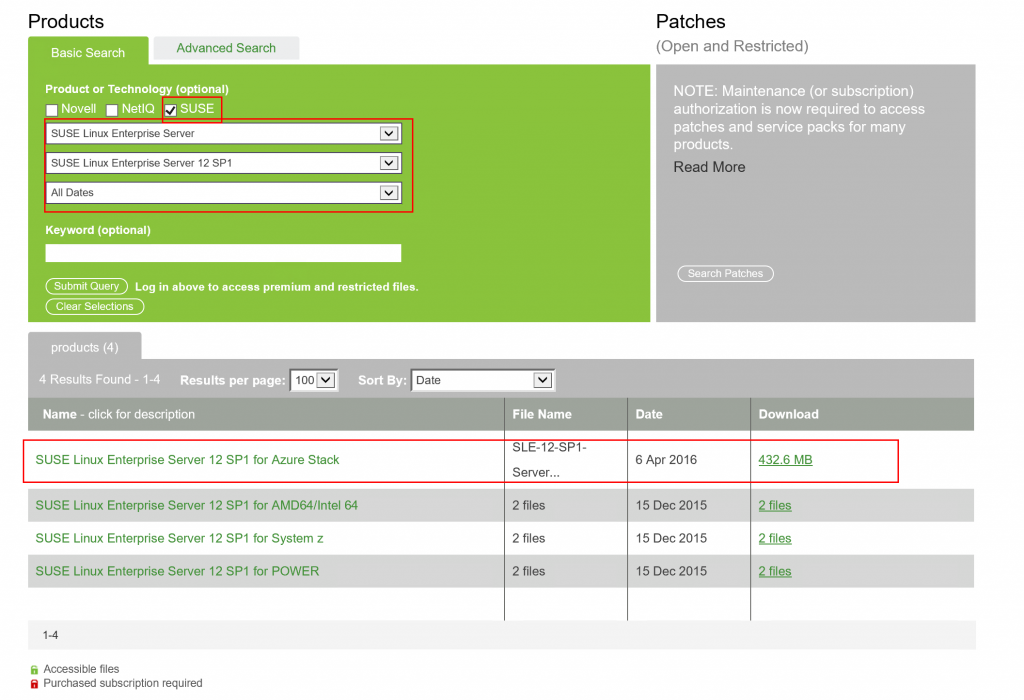
You will be brought to a login page to access the download. If you do not have a SUSE account sign up for one and login. You will see the actual download at that point. Go ahead and download it onto your Azure Stack Host.
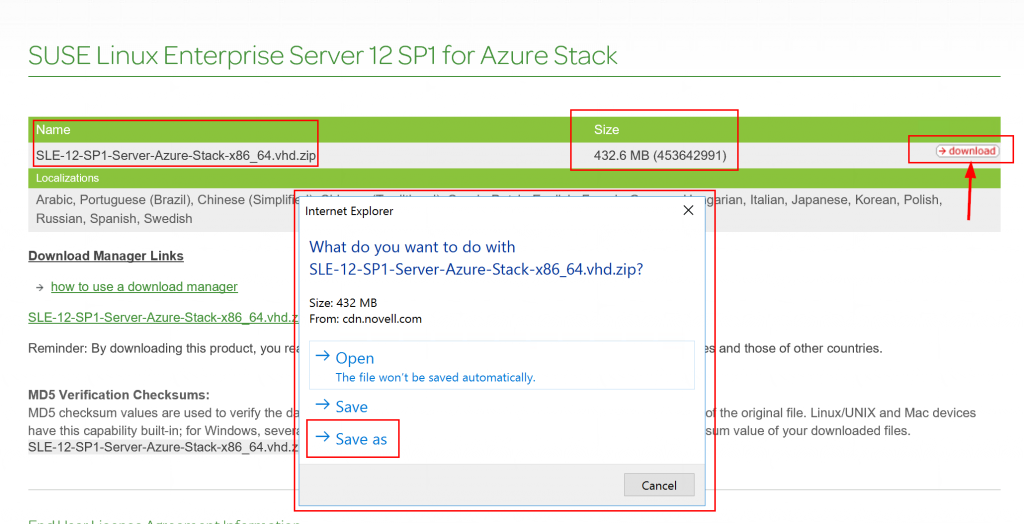
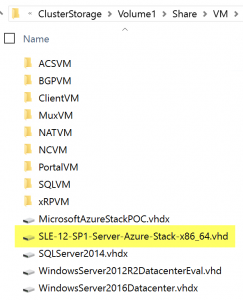
Extract the SLE-12-SP1-Server-Azure-Stack-x86_64.vhd and copy it to C:\ClusterStorage\Volume1\Share\VM.
Microsoft has the steps for adding images to Azure Stack’s Platform Image Repository (PIR). The process is essentially running a PowerShell script. The script is included with Azure Stack. The script creates the image directory needed in C:\ClusterStorage\Volume1\Share\CRP\PlatformImages, the JSON file in that directory, and makes a copy of the VHD in that directory. The JSON file contains the meta data about the image that shows in the Azure Stack Portal. Here is the link to the Microsoft document: https://azure.microsoft.com/en-us/documentation/articles/azure-stack-add-image-pir/
Here are the steps for running the script:
In PowerShell navigate to:
D:\CRP\VM\Microsoft.AzureStack.Compute.Installer\content\Scripts
Run this script in PowerShell:
.\CopyImageToPlatformImageRepository.ps1
NOTE: My DATAIMAGE drive letter was D. You may have a different letter.
You will be prompted for the following:
- PlatformImageRepositoryPath use this \\SOFS\Share\CRP\PlatformImages\
- ImagePath I put C:\ClusterStorage\Volume1\Share\VM\SLE-12-SP1-Server-Azure-Stack-x86_64.vhd
- Publisher I put SUSE
- Offer I put LinuxServer
- Sku I put SUSE-Linux-Ent-12-SP1
- Version I put 12.0.0
- OsType I put Linux

NOTE: These prompts are used to populate the JSON file for the image. Here is an example of the JSON file:
{
“Publisher”:”SUSE”,
“Offer”:”LinuxServer”,
“Sku”:”SUSE-Linux-Ent-12-SP1″,
“Version”:”12.0.0″,
“PlatformImage” :{
“OsDisk” : {
“OsType”:”Linux”,
“FileName”:”SLE-12-SP1-Server-Azure-Stack-x86_64″
}
}
}
Alternatively you could run the script as:
.\CopyImageToPlatformImageRepository.ps1 -PlatformImageRespositoryPath ‘\\SOFS\Share\CRP\PlatformImages’ -ImagePath ‘C:\ClusterStorage\Volume1\Share\VM\SLE-12-SP1-Server-Azure-Stack-x86_64.vhd’ -Publisher ‘SUSE’ -Offer ‘LinuxServer’ -Sku ‘SUSE-Linux-Ent-12-SP1’ -OsType ‘Linux’
As long as the script worked you should have the following as an end result in C:\ClusterStorage\Volume1\Share\CRP\PlatformImages:
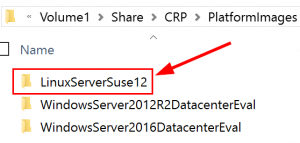
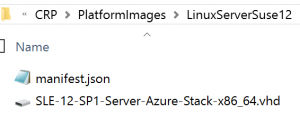
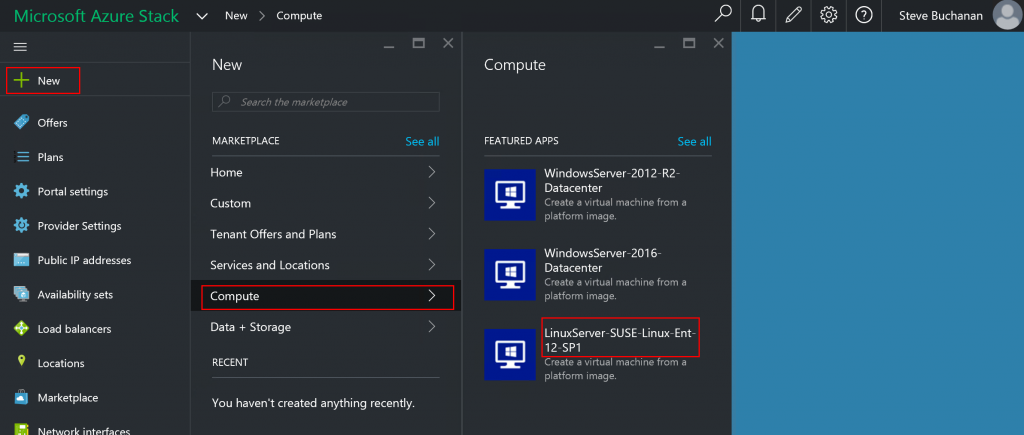
If you have the Azure Stack portal open close out of the browser and go back in. It should be listed as an available image in Compute as shown in the following screenshot.
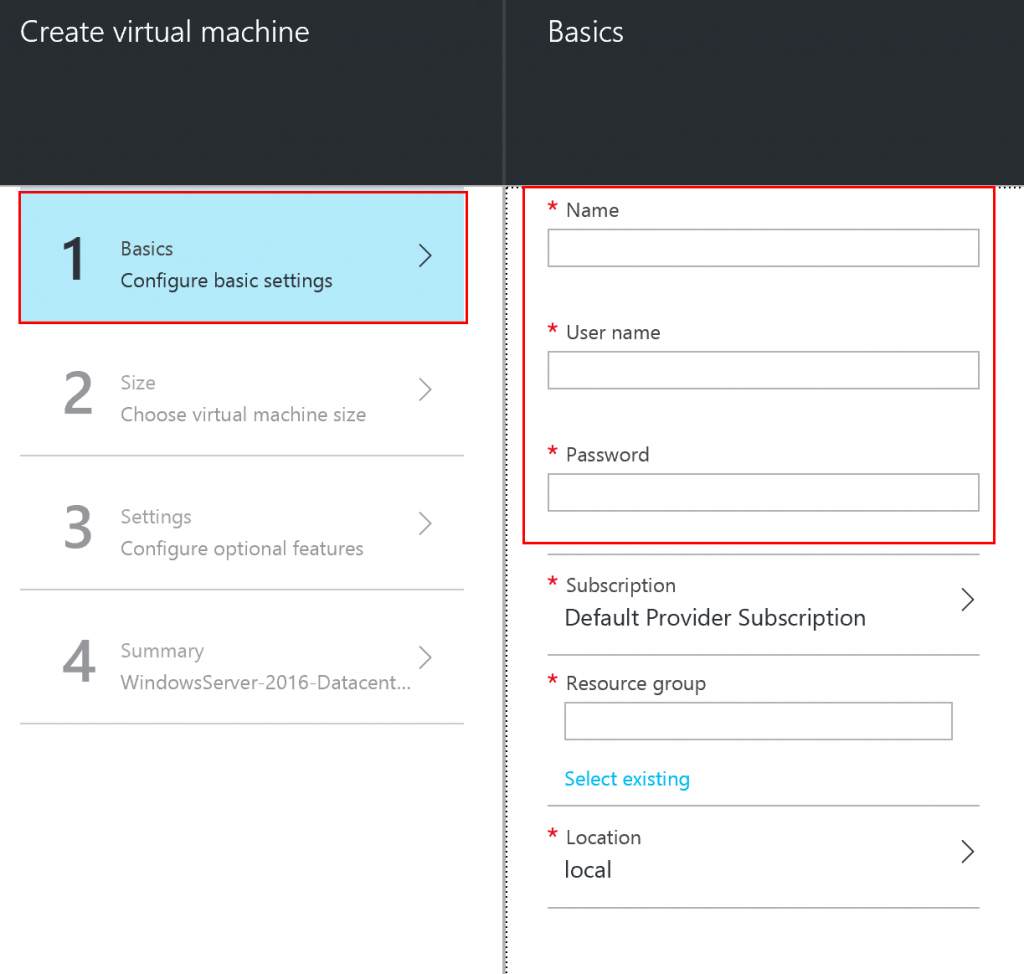
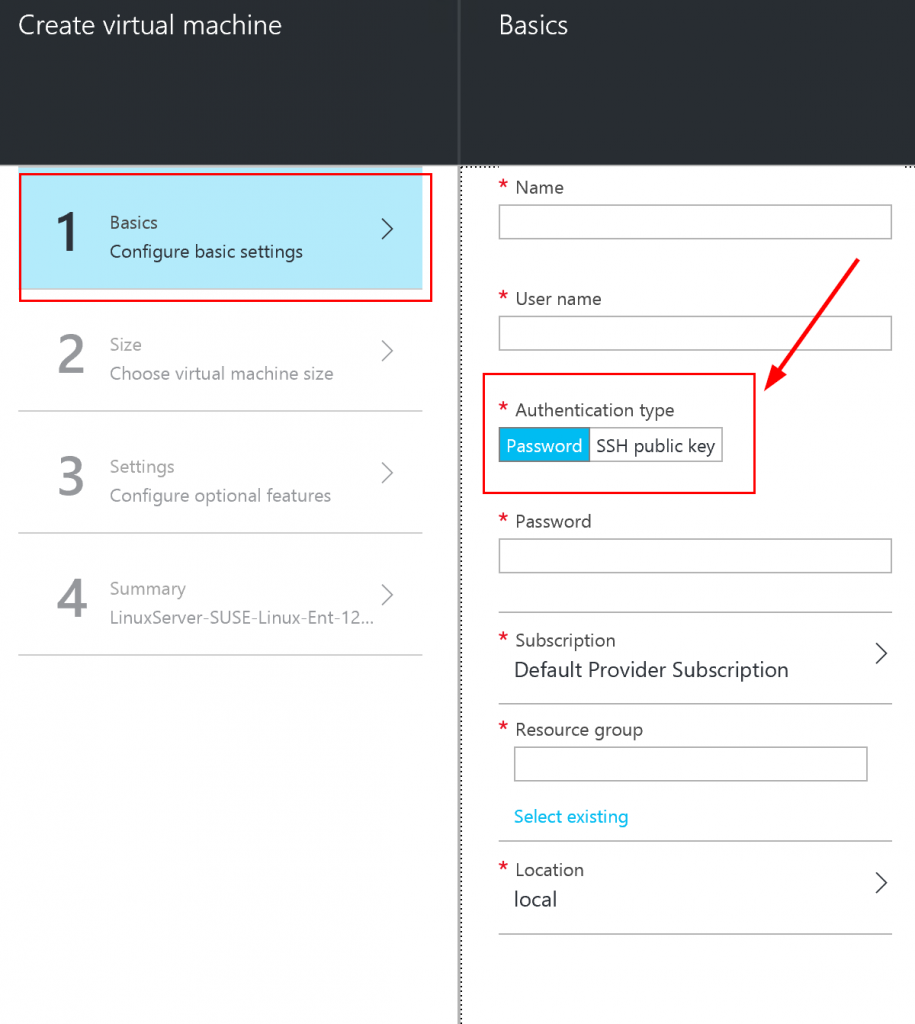
Notice the difference between a Windows image and a Linux image. The Linux image gives you an authentication option of Password or SSH Key.
| Windows |
Linux |
 |
 |
Read more

