Microsoft Professional Program for DevOps Finished!

I am a firm believer that no matter how old you are, how far along you are in your career, and regardless of the industry you are in it is important to continue educating yourself. This helps you expand your skillset, stay relevant, and sets you up for new opportunities as they come along. My field of information technology has been changing at a rapid pace and so for a while, I wanted a good way to ramp up on DevOps as a whole. A while back I found out that Microsoft added a new track to their Professional Program for DevOps. When I checked it out I found it to be very thorough and it was not just focused on Microsoft’s DevOps tooling but included non-Microsoft as well. I jumped in without hesitation and started learning.

I finally completed the program last week. Here is my certificate https://academy.microsoft.com/en-us/certificates/67284e84-8afe-4f13-b477-d7620949fb18. I am planning to dive into the program they have for cloud next. If you have not heard of Microsoft’s Professional Program DevOps before here more information about it:

“DevOps is the union of people, process, and products to enable continuous delivery of value to end users. This program helps the student learn about continuous integration and deployment, infrastructure as code, testing, databases, containers, and application monitoring: skills necessary for a DevOps culture in today’s workplace. This program focuses on Microsoft DevOps technologies as well as some OSS (Open Source Software) DevOps tools. Some of the Microsoft DevOps technologies covered in this course consist of Azure, Azure Resource Manager, IaaS, PaaS, IIS, Azure App Service, DevTest labs, Desired State Configuration (DSC), Azure Automation, OMS, Application Insights, SQL, Nuget, TFS, VSTS, and Visual Studio. Some of the OSS DevOps tools covered in this course consist of Jenkins, Git, Github, New Relic, Nagios, Chef, Docker, DC/OS, swarm, and Kubernetes.”

Here is a link to it:  https://academy.microsoft.com/en-us/tracks/devops

This program consists of 8 required courses. Each course runs for three months and starts at the beginning of a quarter. In the end, there is a capstone that has to be completed. This capstone course is the 8th one. You have four weeks to complete the capstone. The capstone is a bunch of hands-on stuff you have to do. Courses average 16-32 hours per course to complete and are taken via the edX.org platform https://www.edx.org/microsoft-professional-program-devops.

Here is a list of all of the DevOps program courses:

      • Introduction to Dev Ops Practices
      • Infrastructure as Code
      • Continuous Integration and Continuous Deployment
      • Configuration Management for Containerized Delivery
      • DevOps Testing
      • DevOps for Databases
      • Application Monitoring and Feedback Loops
      • Microsoft Professional DevOps Capstone Project
      • The DevOps Capstone Project contains:
        • Automation
          • Use ARM templates to deploy and configure Infrastructure in Azure
        • Continuous Integration
          • Implement Continuous Integration solution using Visual Studio Team services (VSTS)
        • Continuous deployment
          • Implement Continuous Deployment solution using Visual Studio Team Services (VSTS)
        • Testing
          • Implement Unit tests
          • Implement Testing in Production
        • Application Monitoring
          • Implement application monitoring solution using Application Insights

As you can see from that list this program is not just all about VSTS. There is a lot of Azure baked in as well as other non-Microsoft DevOps tooling. I highly recommend this course for anyone jumping into DevOps, or CloudOps and especially for folks with an IT pro background. If CloudOps is foreign to you here are a couple of blogs related to this topic: Sys Admin to Cloud Admin…ITSM to CloudOps…On-Prem to Azure Stack/Azure and Native Cloud Management in Azure.

My personal opinion is that Microsoft should move away from the certifications as they are and to this format. This format combines training and testing. When Microsoft first started the Professional Program for they only had a track for data scientists. They have added more and more tracks over time. Today there are tracks also for Big Data, Web Development, Software Development, AI, IT Support, and Cloud Administration.

Here is a link for all the tracks so you can check them out: https://academy.microsoft.com/en-us/professional-program/tracks. These programs are a great way to expand your learning. Check them out!

Read more

Azure Stack SQL RP – Need Azure PowerShell with version 1.2.9 Error

I ran into this error when installing the Azure Stack SQL RP on the Azure Stack Development Kit:

Azure Powershell Module with 1.2.10 version found. Need Azure Powershell with version 1.2.9. Please uninstall the “current version and rerun the RP setup

If you look at the SQL RP doc here:

https://docs.microsoft.com/en-us/azure/azure-stack/azure-stack-sql-resource-provider-deploy

It says “If you have installed any versions of the AzureRm or AzureStack PowerShell modules other than 1.2.9 or 1.2.10, you will be prompted to remove them or the install will not proceed. This includes versions 1.3 or greater.” on step #6 under Deploy the resource provider.


On my ASDK host I had:

and

The funny part is that in the SQL RP deployment script titled has a line where it installs AzureStack 1.2.10 but this is the version that the SQL RP deployment script is complaining about. Here is the syntax from the SQL deployment script.

# Installs and imports the API Version Profile required by Azure Stack into the current PowerShell session.

Use-AzureRmProfile -Profile 2017-03-09-profile

Install-Module -Name AzureStack -RequiredVersion 1.2.10 -Force

So the next thing I tried to do was run:

Get-Module -ListAvailable | where-Object {$_.Name -like “Azure*”} | Uninstall-Module

It kept throwing these warnings and errors:

WARNING: The version ‘1.0.4.4’ of module ‘Azure.Storage’ is currently in use. Retry the operation after closing the applications.

PackageManagement\Uninstall-Package : Module ‘Azure.Storage’ is in currently in use.

At C:\Program Files\WindowsPowerShell\Modules\PowerShellGet\1.0.0.1\PSModule.psm1:2157 char:21

+ …        $null = PackageManagement\Uninstall-Package @PSBoundParameters

+                    ~~~~~~~~~~~~~~~~~~~~~~~~~~~~~~~~~~~~~~~~~~~~~~~~~~~~~~

    + CategoryInfo          : InvalidOperation: (Microsoft.Power…ninstallPackage:UninstallPackage) [Uninstall-Package], Exception

    + FullyQualifiedErrorId : ModuleIsInUse,Uninstall-Package,Microsoft.PowerShell.PackageManagement.Cmdlets.UninstallPackage

So now I was stuck in this endless loop of PowerShell module uninstall and install hell. For a moment I thought I went insane. After recovering from temporary insanity. I ran this:

Get-InstalledModule -Name “AzureStack” -RequiredVersion 1.2.10 | Uninstall-Module

No errors on this. I then ran:

Get-Module  -ListAvailable | where-Object {$_.Name -like “Azure*”}

to see if the module was gone. Boom it was!

I then kicked off the SQL RP deployment script again and this time it worked!

NOTE: If you somehow have AzureRM version 1.2.10 just run Get-InstalledModule -Name “AzureRM” -RequiredVersion 1.2.10 | Uninstall-Module to get rid of that guy.

Read more

Detailed SQL RP Azure Stack TP2 Deploy & Config

Microsoft has made a new version of the SQL resource provider (RP) for Azure Stack TP2 available. It can be found here in the documentation: https://docs.microsoft.com/en-us/azure/azure-stack/azure-stack-sql-resource-provider-deploy. This RP is an add-on for Azure Stack and allows you to offer SQL as PaaS.

This is a great SQL self-service scenario for Hybrid Cloud. The aforementioned link contains documentation on how to deploy the SQL RP. There are some “Gotchas” with the RP and some other information that is important when deploying and configuring this RP.

I am going to walk through my deployment and configuring experience covering the “Gotchas” and other important information in this blog post. This post will be broken out into the following sections:

  • Deployment
  • RP Configuration
  • Offer/Plan Setup
  • Tenant provisioning of SQL PaaS

Ok. Now let’s dive into it.

– DEPLOYMENT –

Before you begin go to the document link and review the RP documentation. You can download the RP on this page from the Download the SQL Server RP installer executable file link.

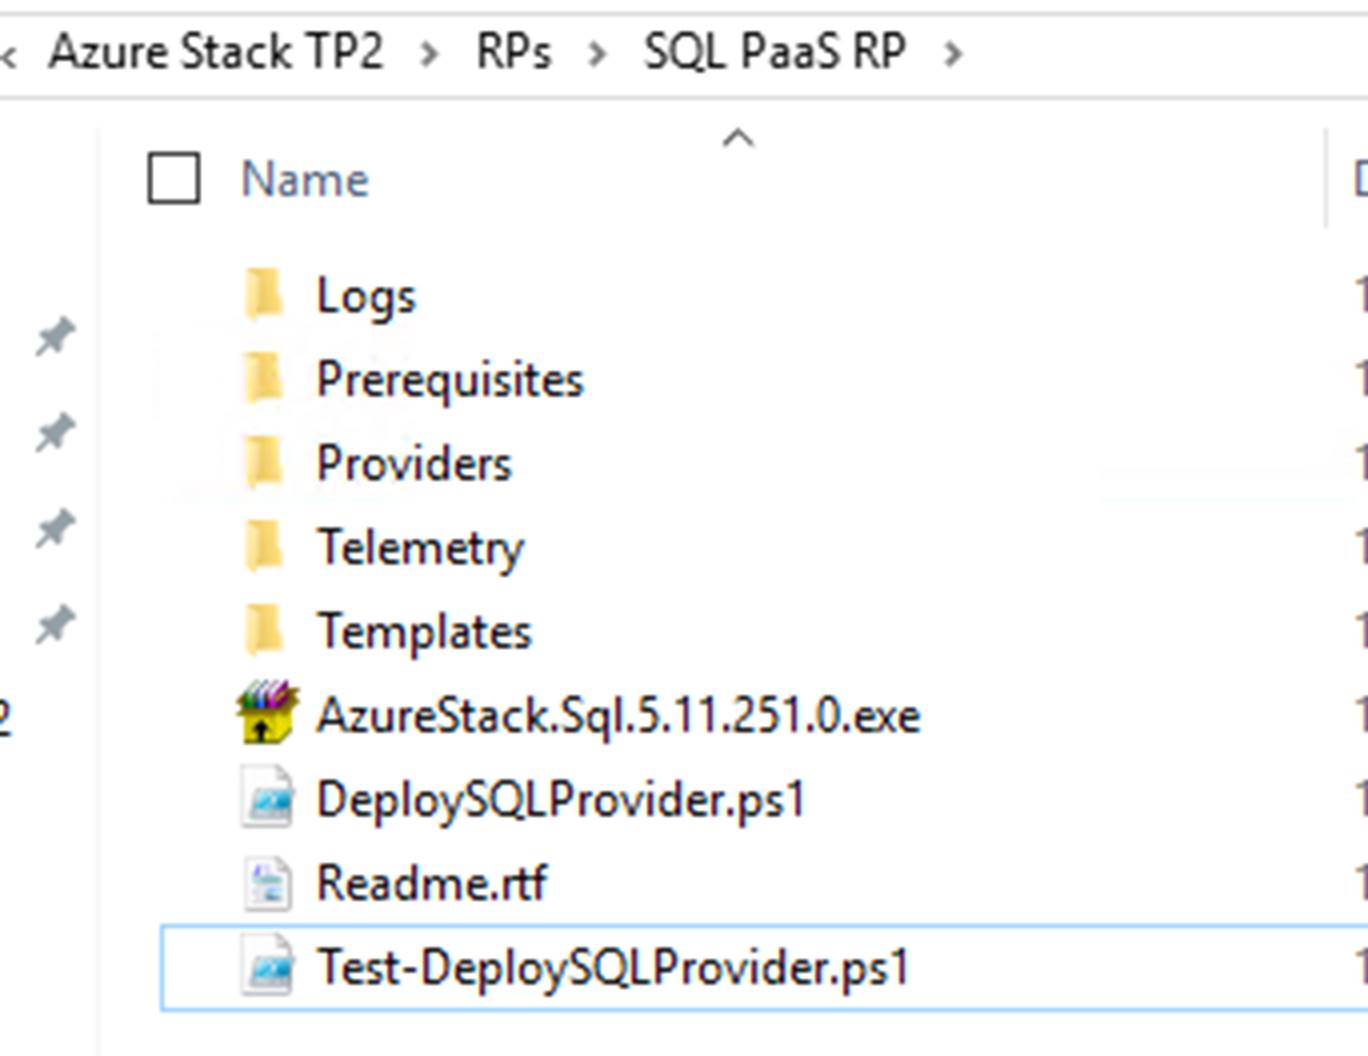
Once the RP is downloaded extract the files and scripts by running AzureStack.Sql.5.11.251.0.exe. You should have the following:

mastp2-sql-rp-1

Now from an elevated PowerShell window run DeploySQLProvider.ps1.

NOTE: Important this should not be run from PowerShell ISE. It fails when it is run from ISE and you may end up with a partial deployment that requires cleanup.

NOTE: Also you can specify a local location for the SQL 2014 SP1 Enterprise Evaluation ISO if you have it downloaded already. To do this run the script with a parameter of -DependencyFilesLocalPath. If not specified the ISO will be downloaded during deployment. I prefer to let the script download it as a part of the deployment.

This script will do the following:

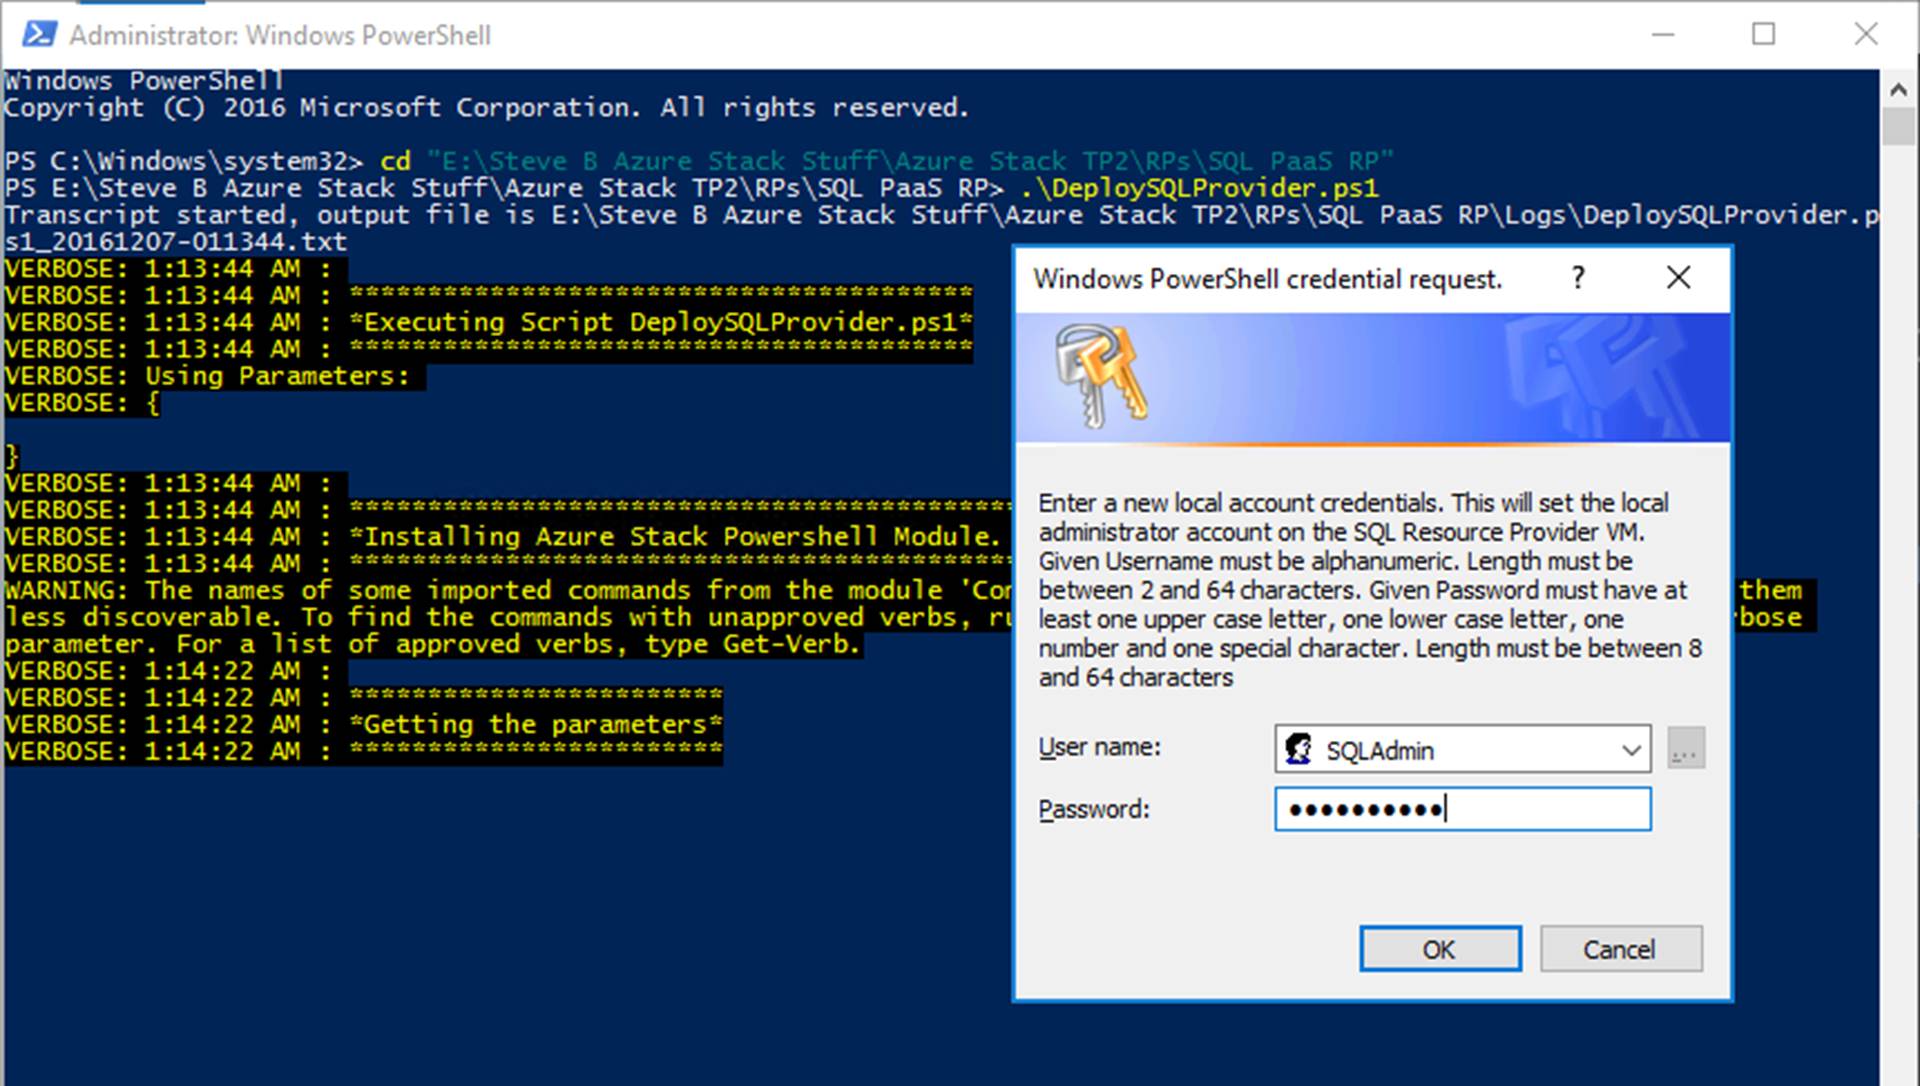
The script will prompt you to input local admin account info. Note that the password you input here will also be used for the SQL SA account.

mastp2-sql-rp-2

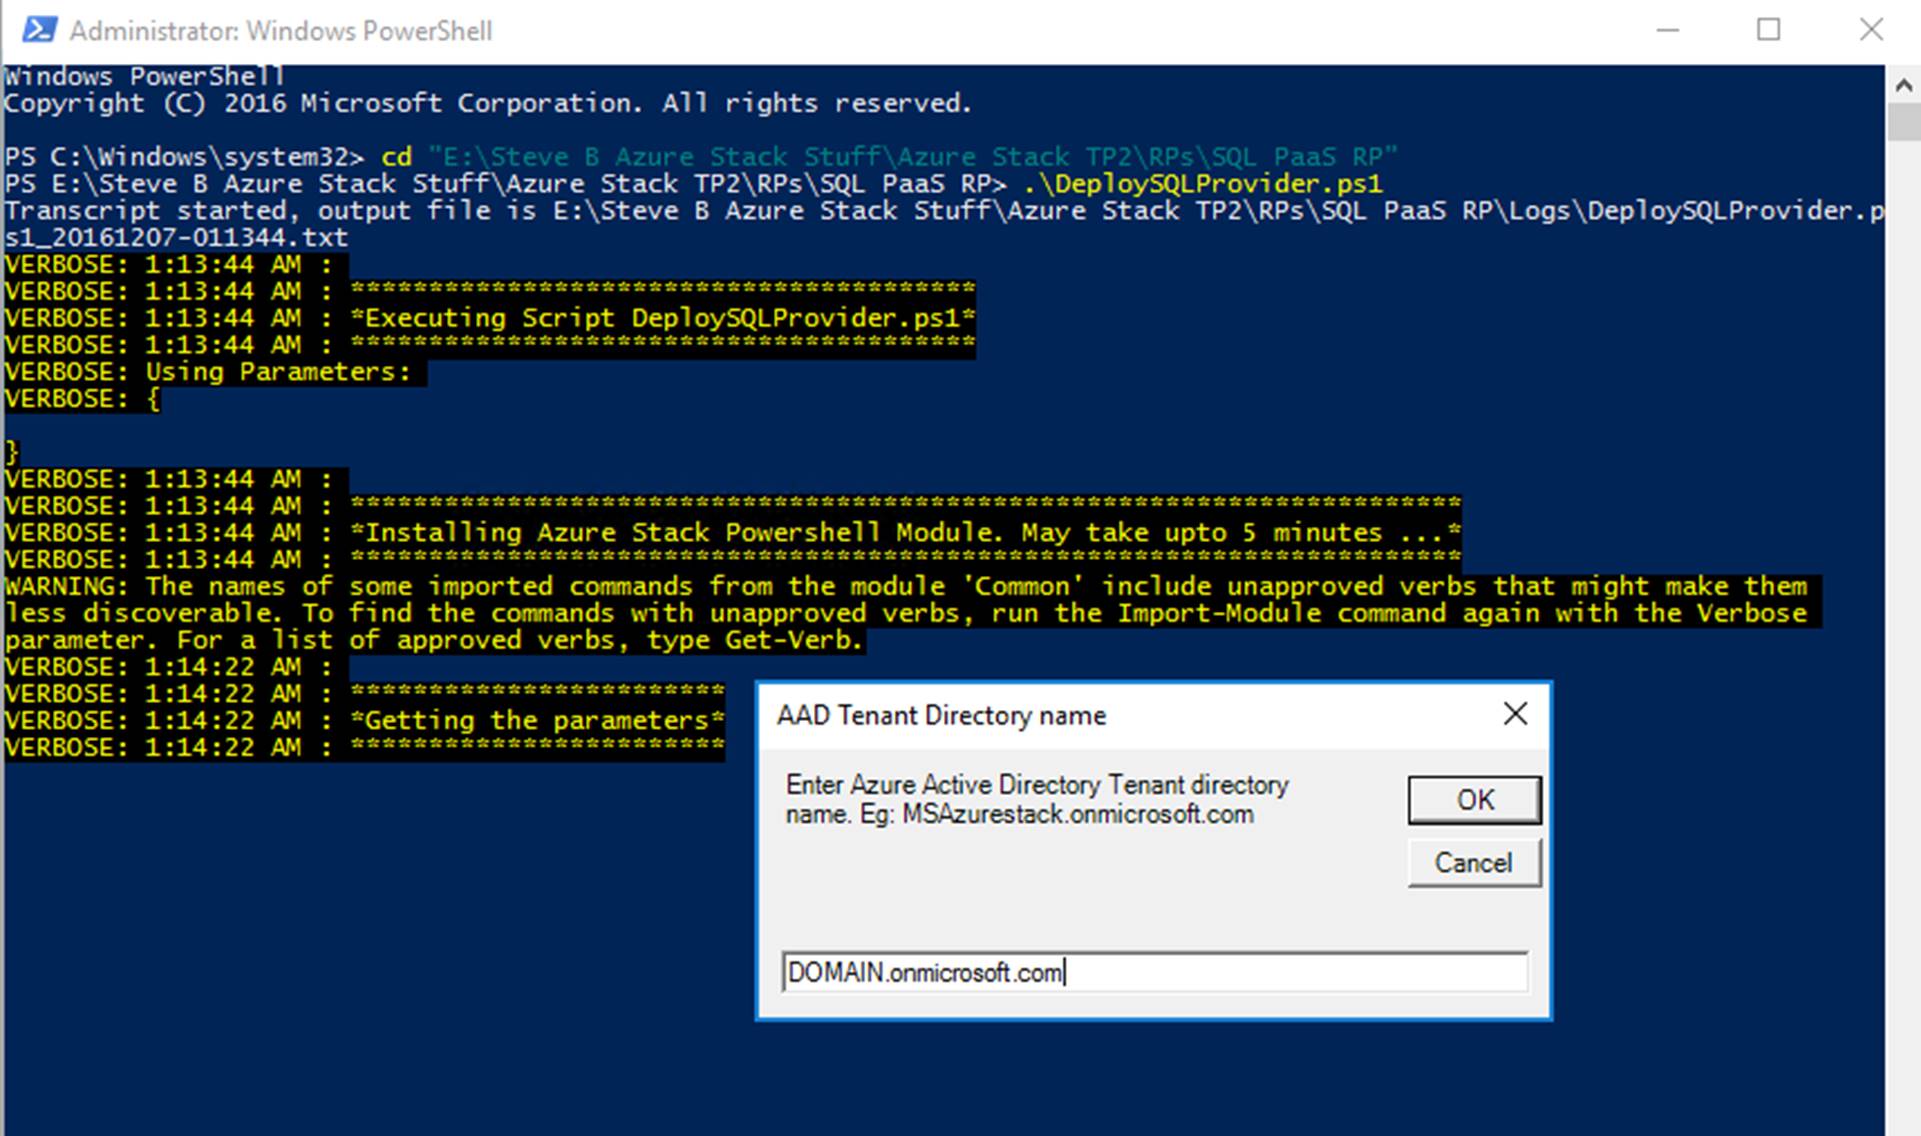
The script will then prompt you for your Azure Active Directory tenant name. This is YOURDOMAIN.onmicrosoft.com.

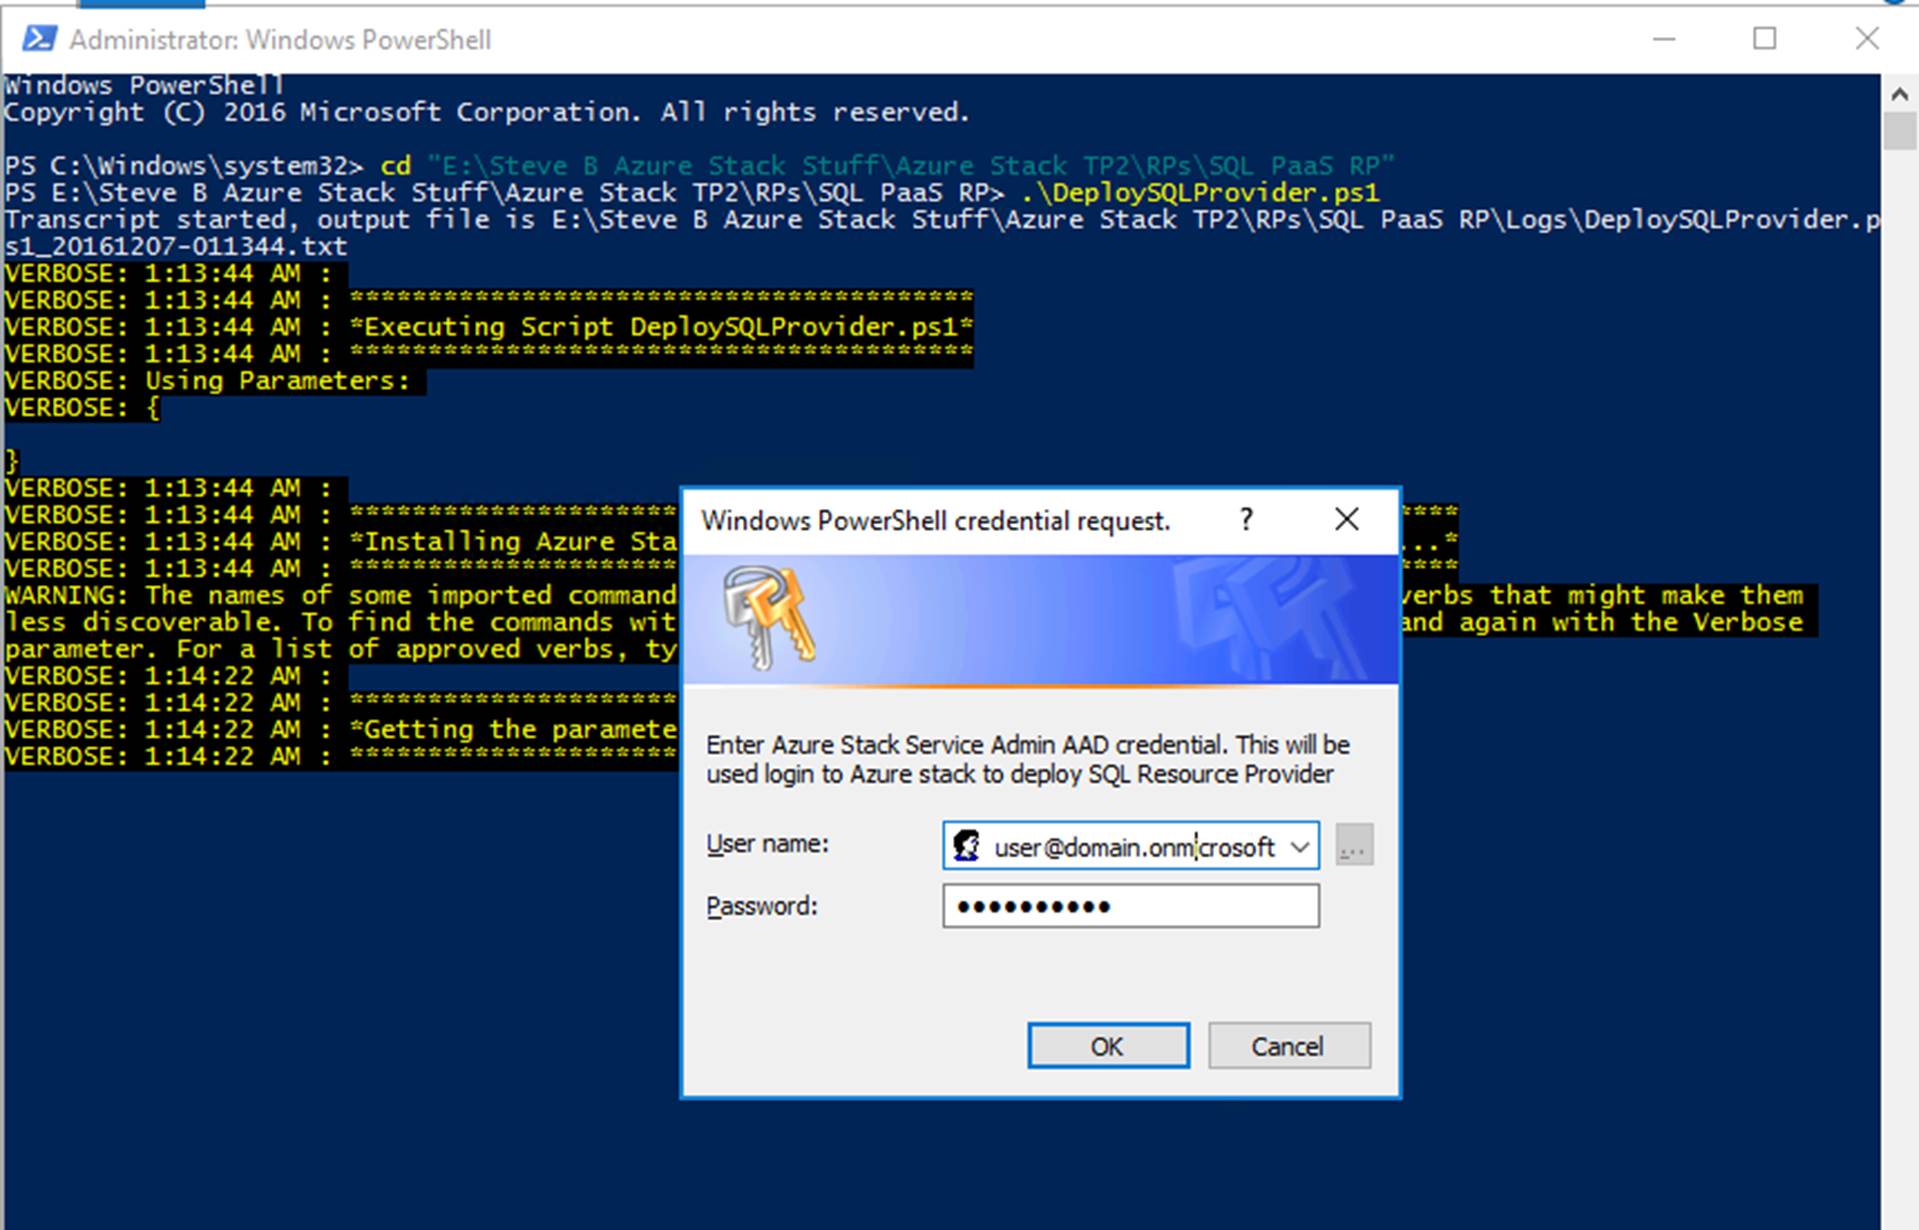
You will then be prompted for an Azure Active Directory account. This should be the account you deployed Azure Stack TP2 with. This will be used to access Azure Stack and create stuff such as the resource provider, resource group and other resources needed by the RP.

mastp2-sql-rp-4

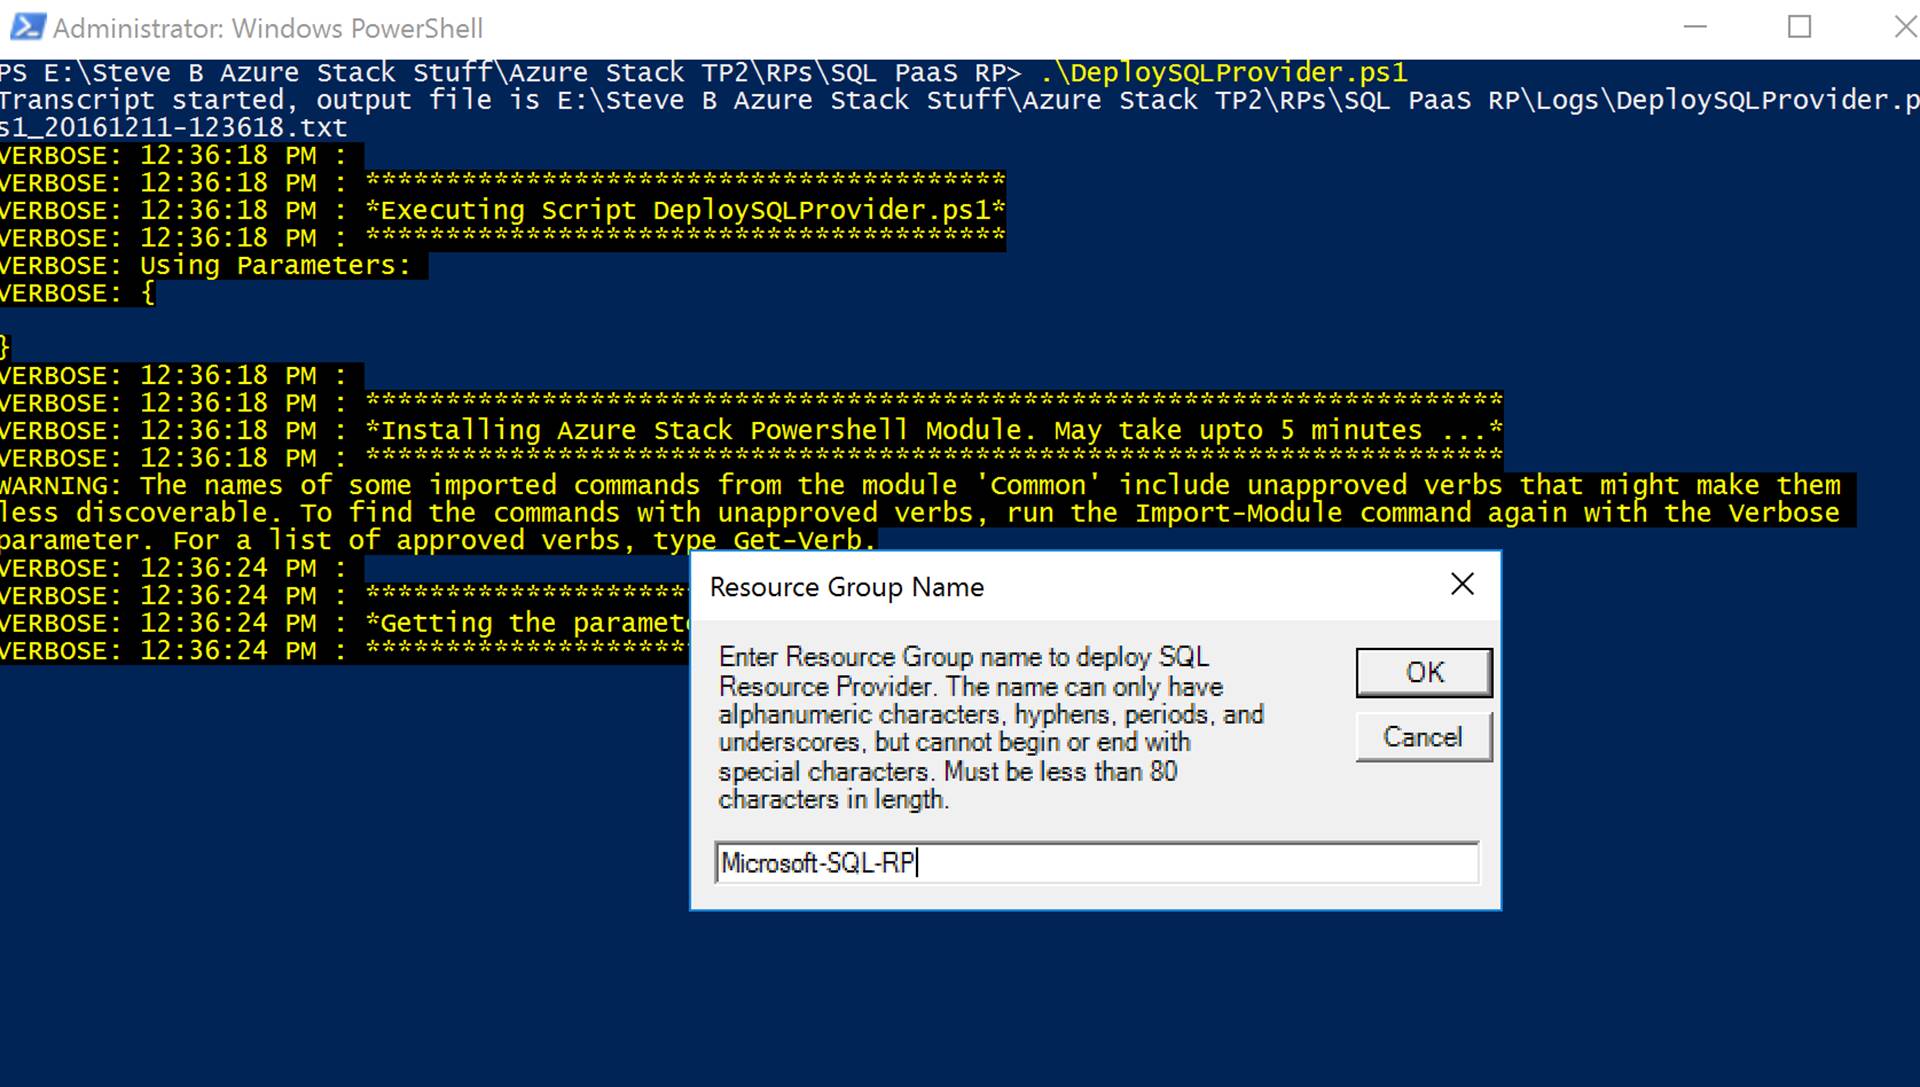
You need to enter a resource group name. You can leave the default if you want.

mastp2-sql-rp-5

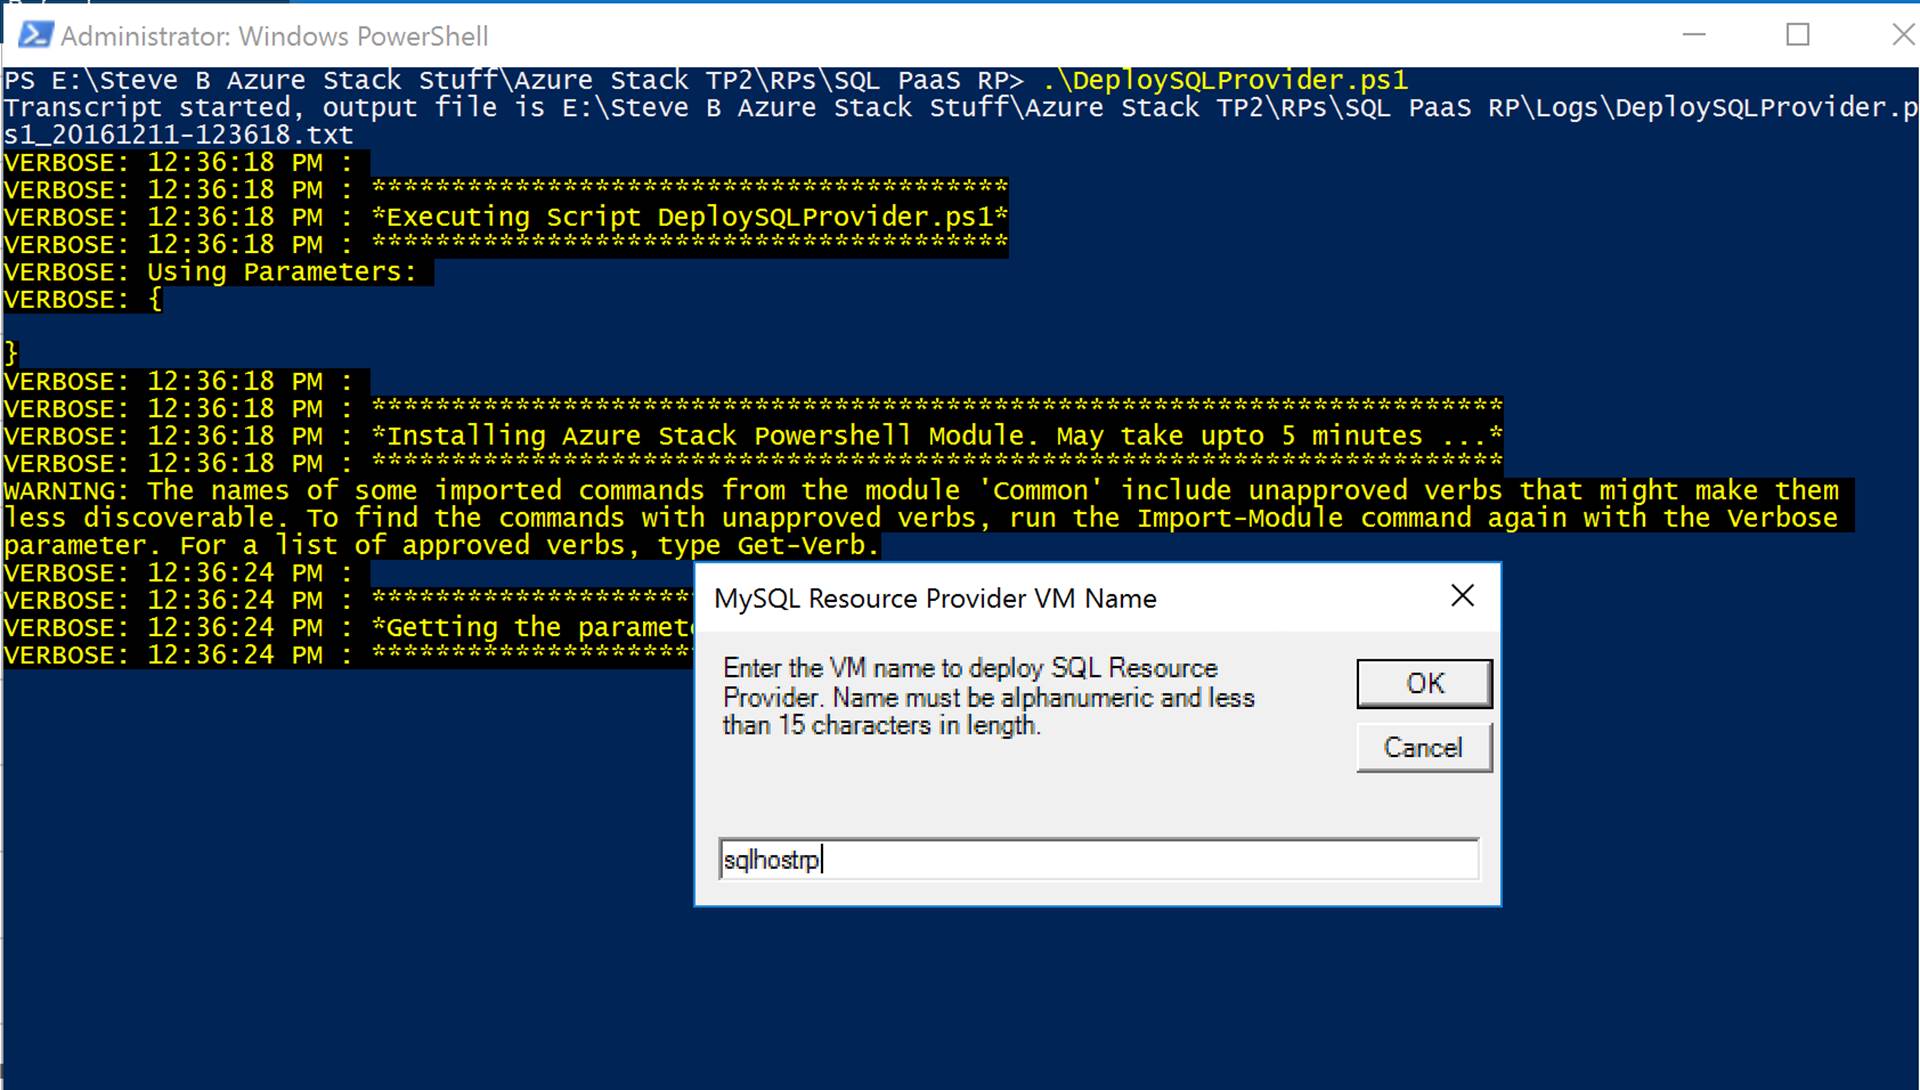
You will then be prompted for the SQL server VM Name. Ignore the title of the pop-up here.

mastp2-sql-rp-6

The script will then run through all of its steps. Here is what the script does as detailed in the official documentation:

  • If necessary, download a compatible version of Azure PowerShell.
  • Create a wildcard certificate to secure communication between the resource provider and Azure Resource Manager.
  • Download an evaluation build of SQL Server SP1 from the internet or from a local file share.
  • Upload the certificate and all other artifacts to a storage account on your Azure Stack.
  • Publish gallery package so that you can deploy SQL database through the gallery.
  • Deploy a VM using the default Windows Server 2012 R2 image that comes with Azure Stack.
  • Register a local DNS record that maps to your resource provider VM.
  • Register your resource provider with the local Azure Resource Manager.
  • Connect the resource provider to the SQL server instance on the RP VM

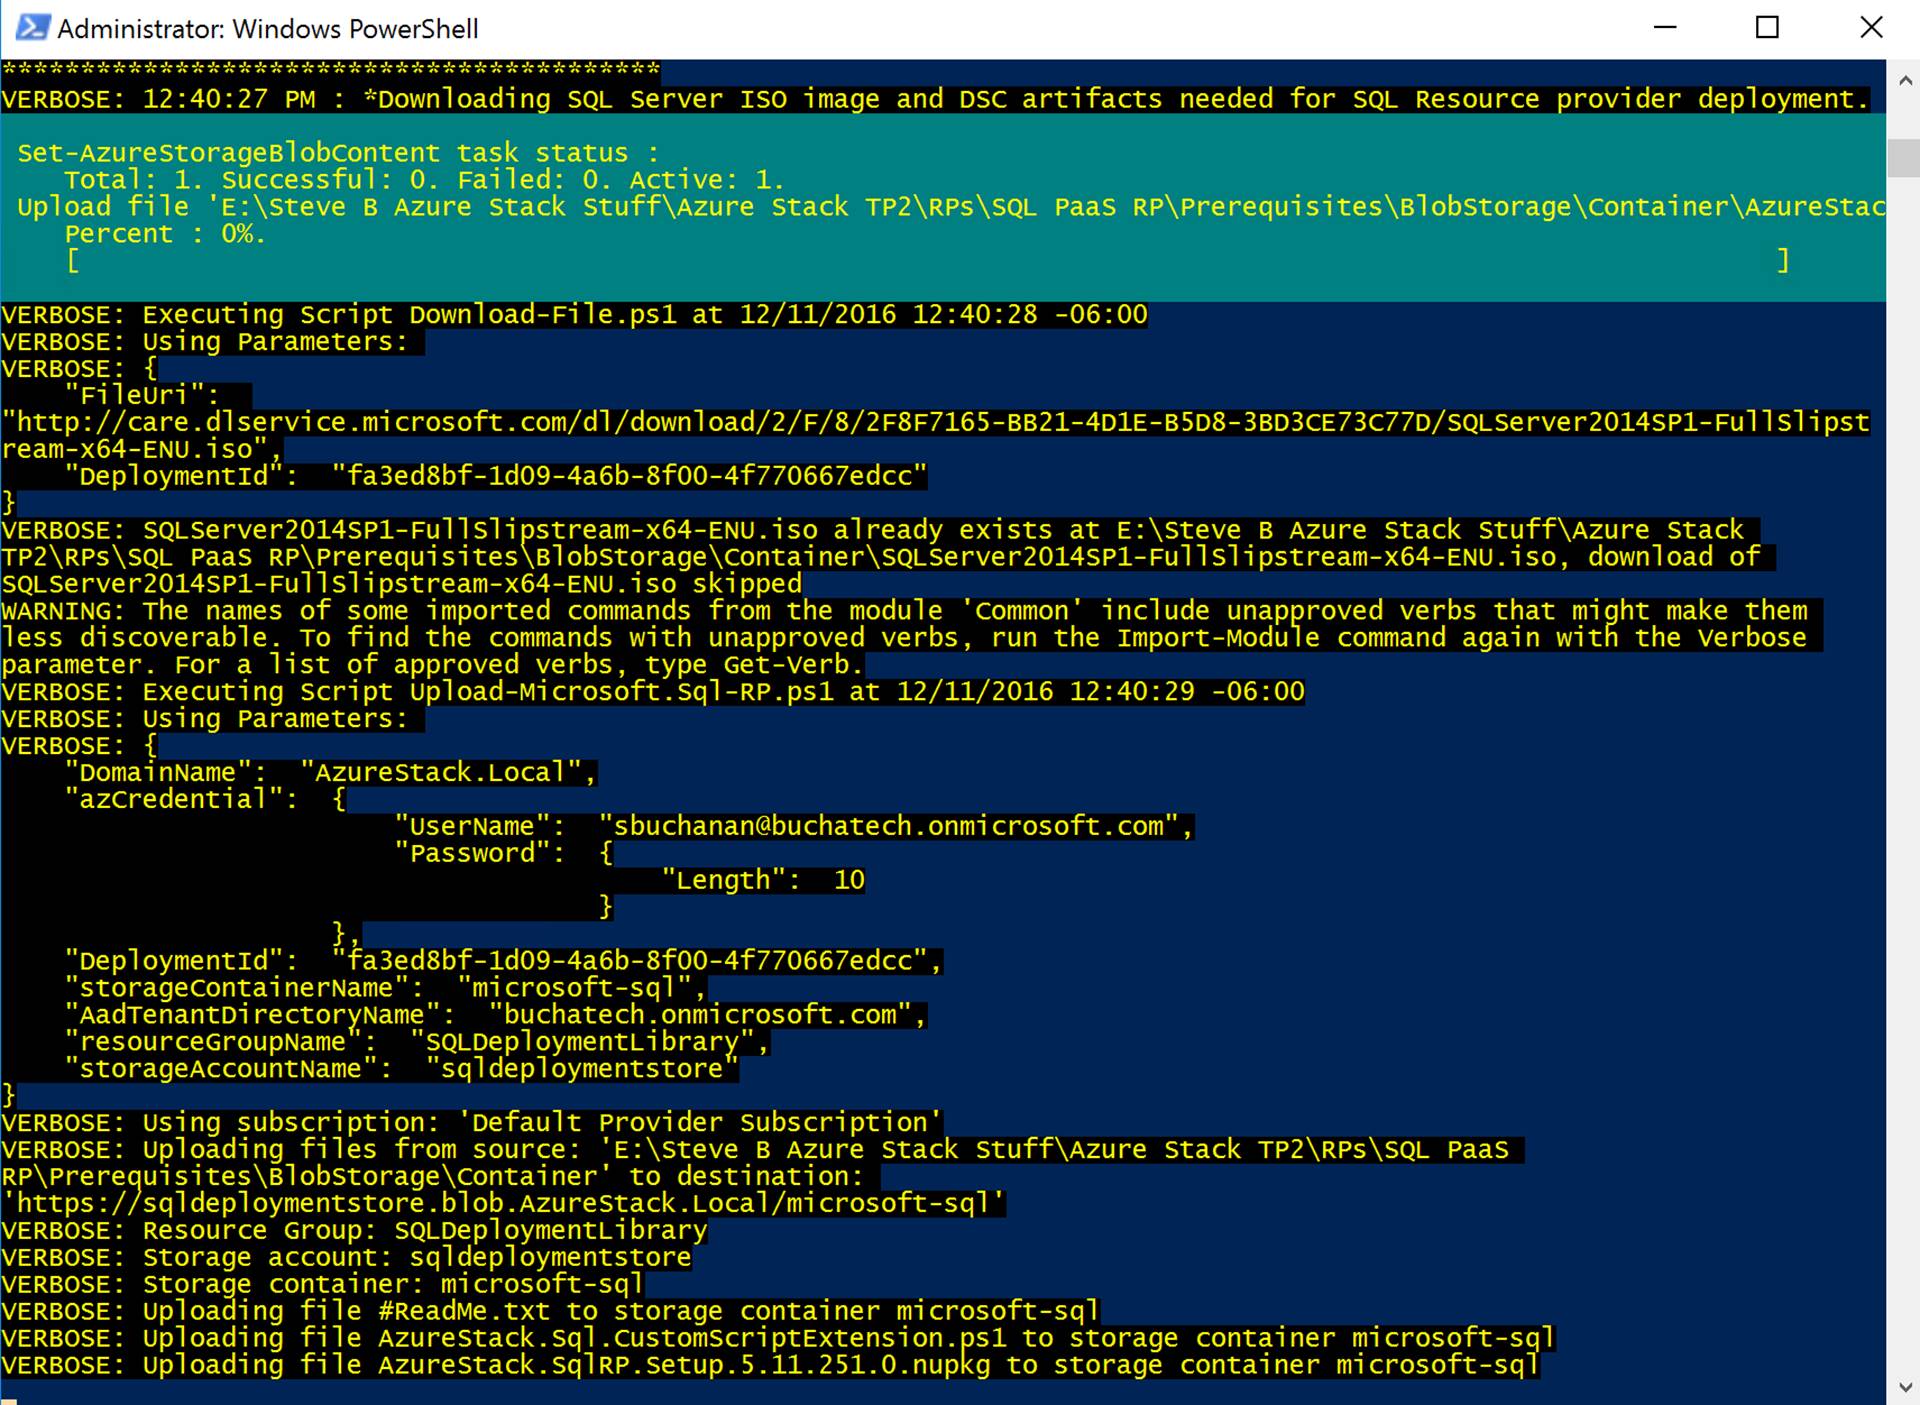
As the script runs you will see it run through each of the steps with detail and status. Be patient. I have had this take anywhere from 30 minutes to 45 minutes. Good time to go take a break.

mastp2-sql-rp-7

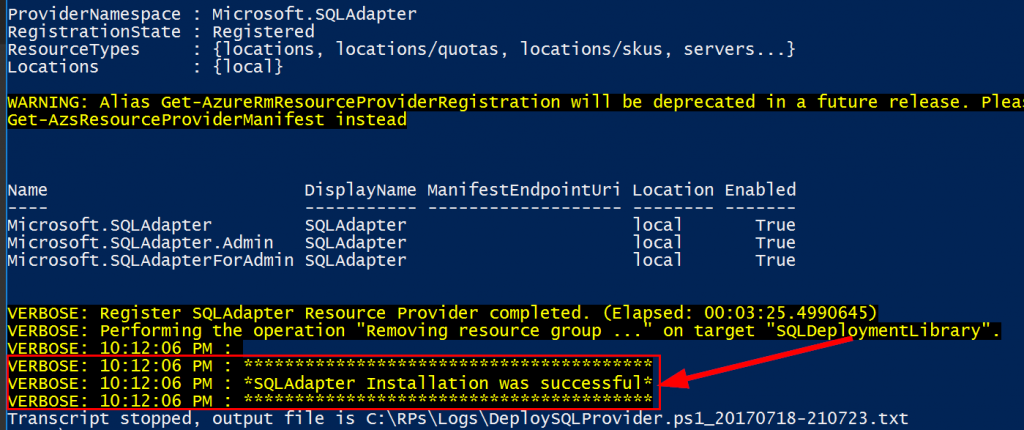
Once the script is done it will show that the installation is successful as shown in the following screenshot.

mastp2-sql-rp-8

NOTE: You could run the deployment script with the required parameters to avoid the prompts. For example:
DeploySQLProvider.ps1 -AadTenantDirectoryName “YOURDOMAIN.onmicrosoft.com” -AzCredential “user@YOURDOMAIN.onmicrosoft.com” -LocalCredential “username”

If for some reason the RP deployment fails you will need to view the logs to troubleshoot. Logging will be found in: LOCATIONOFYOURDOWNLOADEDRP\SQL PaaS RP\Logs in the following format DeploySQLProvider.ps1_20161205-171516.txt as shown in the following screenshot.

mastp2-sql-rp-9

– RP CONFIGURATION –

Read more

SQL Transaction Log for Database is Full Due to Log Backup

For this post we have a guest contributor with some SQL goodness. This will definitely come in handy for us System Center folks as all of the System Center components use SQL. This guest post was written by: Andrew Jackson a SQL expert in the SQL community check him out on the following sites: LinkedIn , google+, his blog. Here is the actual blog post:

Overview

In SQL Server, Every database file is associated with a transaction log that contains all the records of transactions and modifications made by each transaction. The log file plays a very important part as it helps in disaster recovery. The transaction log should be truncated or cleared regularly to keep the size of log file from filling up. One of the common error encountered by the users of the SQL Server is when the transaction log is full, which is possible by various reasons. This blog will be discussing about the Transaction Log Full due to Log Backup.

Problem Statement

The following error message will be displayed like this “The transaction log for database is full due to Log Backup.” It happens when the user is unable to make data entry due to insufficient space. The transaction log file grows very large and consumes too much space over server restricting addition of any data into SQL Tables. The error message is not because of log backup but it actually means the virtual files with the transaction log could not be reused, as it requires log backup. User need to make sure that Log file growth is unrestricted, Storage of log file should have enough space, and regular log backups should be taken.

Possible Solution

There may be several solutions for the situation when the Transaction log file is full such as creating backup or truncate the transaction logs, making the log space available, moving file to another disk drive, increase the log file size or add another log file on different disk.

Since we are talking about the Transaction Log Full Due to Log Backup, we will be performing truncate operation on the transaction log file. Steps that need to be followed to sort the issue are:

  • Open Microsoft SQL Server Management Studio in order to connect to the desired SQL server database.
  • Select the database, which transaction file needs to be truncated
  • Type the T-SQL script below

Read more

Book dedicated to System Center Reporting

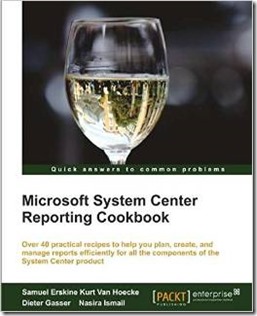
A new System Center book is set to publish this Friday March 27th. This one has me very excited because the focus is on reporting in System Center. And it is not just one or two System Center components they cover them all. This book dives in and gives you recipes’ as to how to build reports that are useful so you can start producing them in your environment today. What I love about this book is that it was developed with the IT pro in mind. The IT pro with no SQL background. Most System Center folks dont have a past in SQL but after some time working with the product they know SQL well. 🙂 This book will help those that want to get going with reporting for System Center and those that want to pick up some new skills. The title of the book is Microsoft System Center Reporting Cookbook. I was approached to be a technical reviewer on this book and jumped at the opportunity. The authors of this book are Samuel Erskine, Kurt Van Hoecke, Dieter Gasser, Nasira Ismail.

This is a book you will want to add to your collection!

Here is the cover for the book and some links with more information:

SCReportingBook

Amazon link to the book:

http://www.amazon.com/Microsoft-System-Center-Reporting-Cookbook/dp/1782171800

Interview with Sam Erskine about the new Microsoft System Center Reporting Cookbook:

https://www.youtube.com/watch?v=cmmthUYszxw&feature=youtu.be

Read more

Point SCSM DW & WAP Request Management to new SQL server

I recently worked with a client that hosted the Service Manager database on a SQL cluster. They manually failed over the SCSM database to the other node in the SQL cluster. Request Management in Azure Pack and the SCSM data warehouse were still trying to communicate with Service Manager using the old node in the SQL cluster. We needed a way to manually flip both Azure Pack and The DW over to the new node in the SQL cluster. Below is how I did this. I am posting about this in case it saves anyone else time and for me if I need it for future reference.

GridPro Request Management in Windows Azure Pack Failover:

Navigate to: C:\inetpub\MgmtSvc-RequestManagementAPI

Open the “solidConnectionSettings.config” file in a text editor such as notepad.

Modify the highlighted value in the connection string to the name of the second node in the SQL cluster:

<connectionStrings>

<add name=”ServiceManagerCMDB” connectionString=”Server=SQLSERVER1,1433;Database=ServiceManager;Integrated Security=True”/>

</connectionStrings>


After this is modified an IIS reset is needed. After that the Request Management in Windows Azure Pack should now attempt to connect to Service Manager on the correct SQL node.

Service Manager Data Warehouse failover:

In regards to the data warehouse we needed to re-point this to the second node in the SQL cluster. To do this I:

Opened the DWStagingAndConfig database.

Open the MT_Microsoft$SystemCenter$ResourceAccessLayer$SqlResourceStore table.

And

Run Select * from MT_Microsoft$SystemCenter$ResourceAccessLayer$SqlResourceStore

Or

Right click on the table and Select Top 1000 rows. (Don’t worry there are only 10 rows in this table.)

clip_image001.png


Note the 5th row column DataService_98B2DDF9_D9FD_9297_85D3_FCF36F1D016B has Service Manager listed. Further along in row 5 under column Server_48B308F9_CF0E_0F74_83E1_0AEB1B58E2FA it has the SQL server for Service Manager that it is pointed to listed. This is what needs to be changed. You can see this in the following screenshot:

clip_image002.png

To change this run the following:

UPDATE MT_Microsoft$SystemCenter$ResourceAccessLayer$SqlResourceStore

SET Server_48B308F9_CF0E_0F74_83E1_0AEB1B58E2FA = ‘SQLSERVER2’

WHERE DataService_98B2DDF9_D9FD_9297_85D3_FCF36F1D016B = ‘ServiceManager’

NOTE: Be sure to replace SQLSERVER2 with the name of your new SQL node.

Now if you Run Select * from MT_Microsoft$SystemCenter$ResourceAccessLayer$SqlResourceStore

You will see row 5 in the Server_48B308F9_CF0E_0F74_83E1_0AEB1B58E2FA column will reflect the change.

clip_image003.png

Read more