~ How to Install System Center Essentials 2010 ~
I recently had the opportunity to setup Microsoft System Center Essentials (SCE 2010) in my network environment. Microsoft System Center Essentials is a management solution for small to mid sized business network environments. It is a combination of a few System Center products including Operations Manager, Configuration Manager, and Virtual Machine Manager. It also includes windows update services. This solutions puts all of these solutions in one interface so an IT professional can efficiently manage their IT environment from physical and virtual servers to clients and other network devices. In this two part post I am going to walk through installing SCE 2010 and some basic configuration.
Software Used:
Below is the list of software you will need for your deployment.
- OS is Windows Server 2008 R2
- SQL Server 2008 R2
- System Center Essentials 2010
Install of SQL:
First thing we need to do is install SQL server. SCE 2010 has a database on the backend and you need somewhere to store this.
You can use a local SQL instance or a remote SQL instance on an existing SQL server. I will walk you through installing this on the same server you will install SCE2010 on.
- Launch your SQL install and click next on the “Setup Support Rules” and “Setup Role” screens accept the defaults.
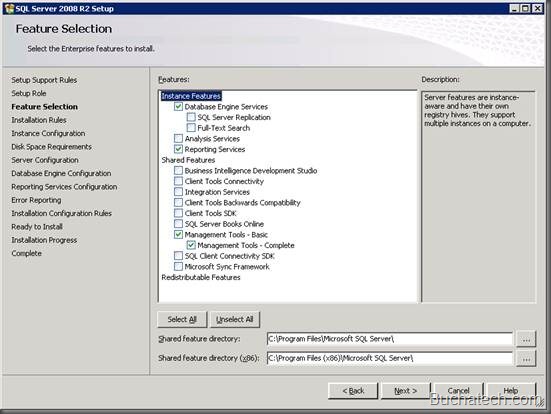
- You will then come to the “Feature Selection” screen select the same features as the image below.
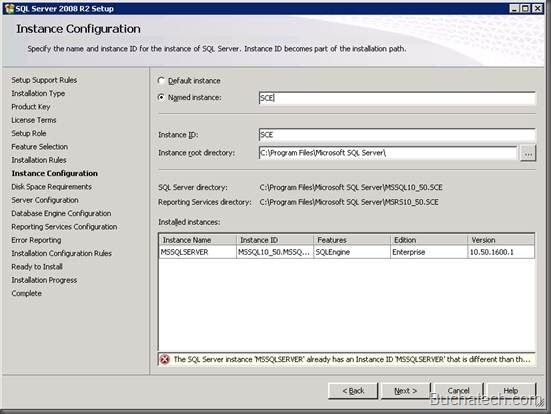
- You can chose to use the default instance. SQL will give it a name for you. I like to use named instances. Chose one of the options and click next.
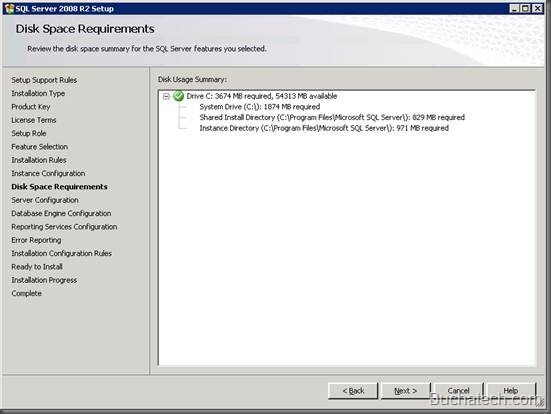
- This screen shows you how much disk space will be used. Review it then click next.
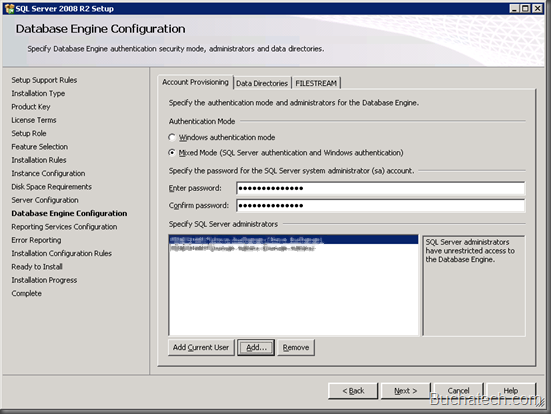
- Here you can chose Windows Authentication or Mixed Mode. Windows Authentication will use the account you are logged onto the server with to access SQL. With Mixed Mode you will need to add the accounts you want to have access to the SQL instance. Enter a password for the SA account and click next. Chose an option configure your settings and click next.
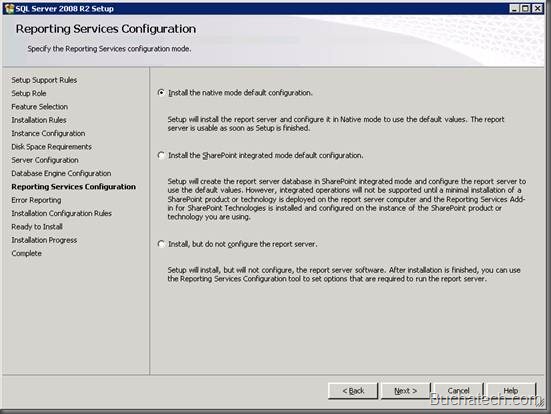
- Chose default for Reporting services and click next.
There are three more screens accept the defaults and click next. When you get to the “Ready to Install” screen click install to install your SQL instance.
Install of SCE 2010:
Now that SQL is installed lets jump right into the install of SCE 2010. SCE 2010 has some prerequisites. Make sure these are installed on the server before you install SCE 2010.
- OS needs to be Windows 2008R2, Windows 2003 sp2,SBS 2008 or EBS 2008
- You need to be in a Active Directory domain
- NET Framework 3.5sp1
- IIS web server
- SQL server 2008 (local or remote) (We covered this above)
- At least 20GB free disk space (150GB free disk space to install System Center Virtual Machine Manager (SCVMM)and manage virtual machines) (We do not install SCVMM this in this post.)
- At least 4GB RAM
- Launch the SCE 2010 install from the disk. Complete the following fields in the image enter your key and click next.
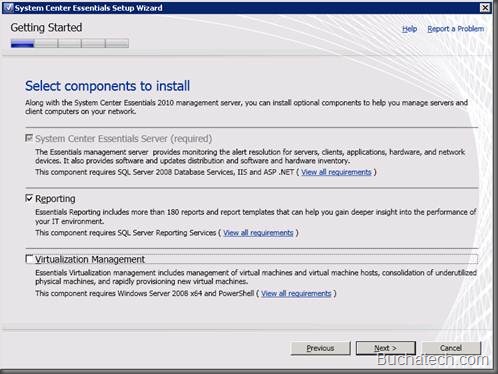
- Select what SCE 2010 components you plan to install and click next. (We do not install Virtualization Management in this post.)
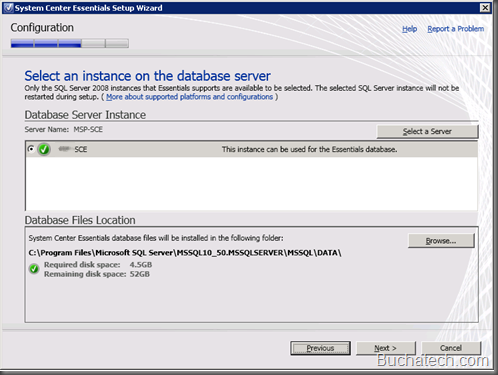
- Select your SQL server instance and click next.
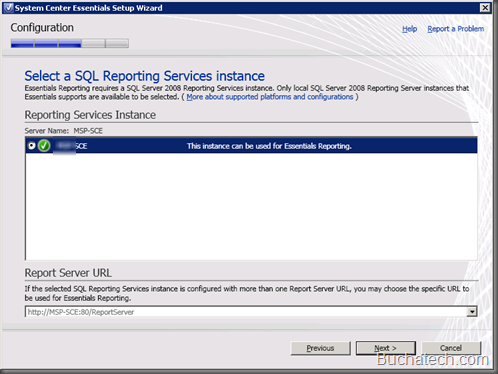
- Select your SQL Reporting Services instance and click next.
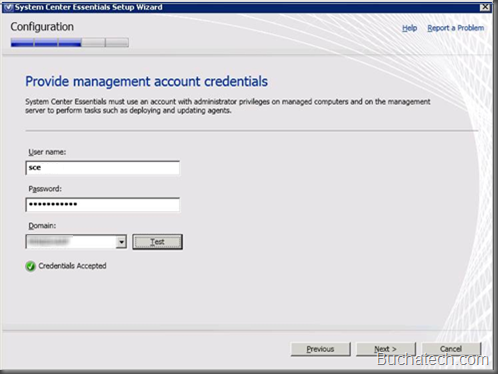
You need to create a SCE 2010 Management Account in Active Directory. SCE uses this account to access managed servers and clients on your network. It is recommended that you create a dedicated account that has domain administrator privileges. We created an Active Directory account named SCE.
- Enter in your Management Account and the password below then click test to make sure the account has the proper rights. Click next if the test was successful.
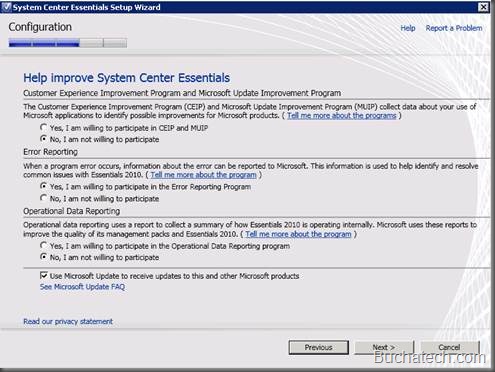
- See the image below and make your selections. I like to use Microsoft Update to receive updates. Click next when done.
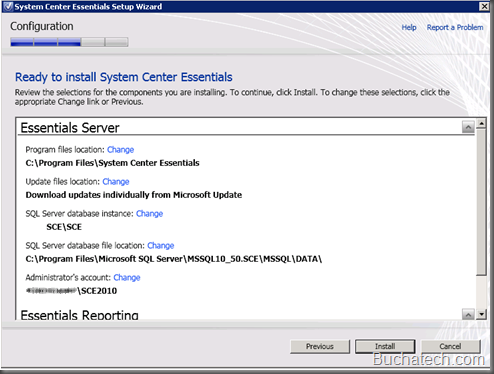
- Review your SCE 2010 install settings and click install.
The install will complete and SCE 2010 will open with the option to configure it. We will cover this in the next post.
Stay tuned for basic configuration of Microsoft System Center Essentials 2010 in post part 2……………………………..
***UPDATE 8-21-2011***
Part 2 of this post on how to configure System Center Essentials 2010 is completed and can be viewed here:
https://www.buchatech.com/2011/08/install-and-configure-system-center-essentials-2010-part-2/



1 thought on “Install and Configure System Center Essentials 2010 Part 1”